Easy Pictures to Draw of Hearts
The heart symbol is recognized around the world as a sign of love and compassion.
The ancient Egyptians believed that the heart was the center of human emotion, and that persists to this day as people exchange hearts to show love for one another.
Even though we all recognize the heart shape, when it comes to drawing one, it can be harder than it might look!
If you're wanting to learn how to draw one yourself, then this is the guide for you.
We created this step by step on how to draw a heart in 7 easy steps to make drawing a heart easier than ever!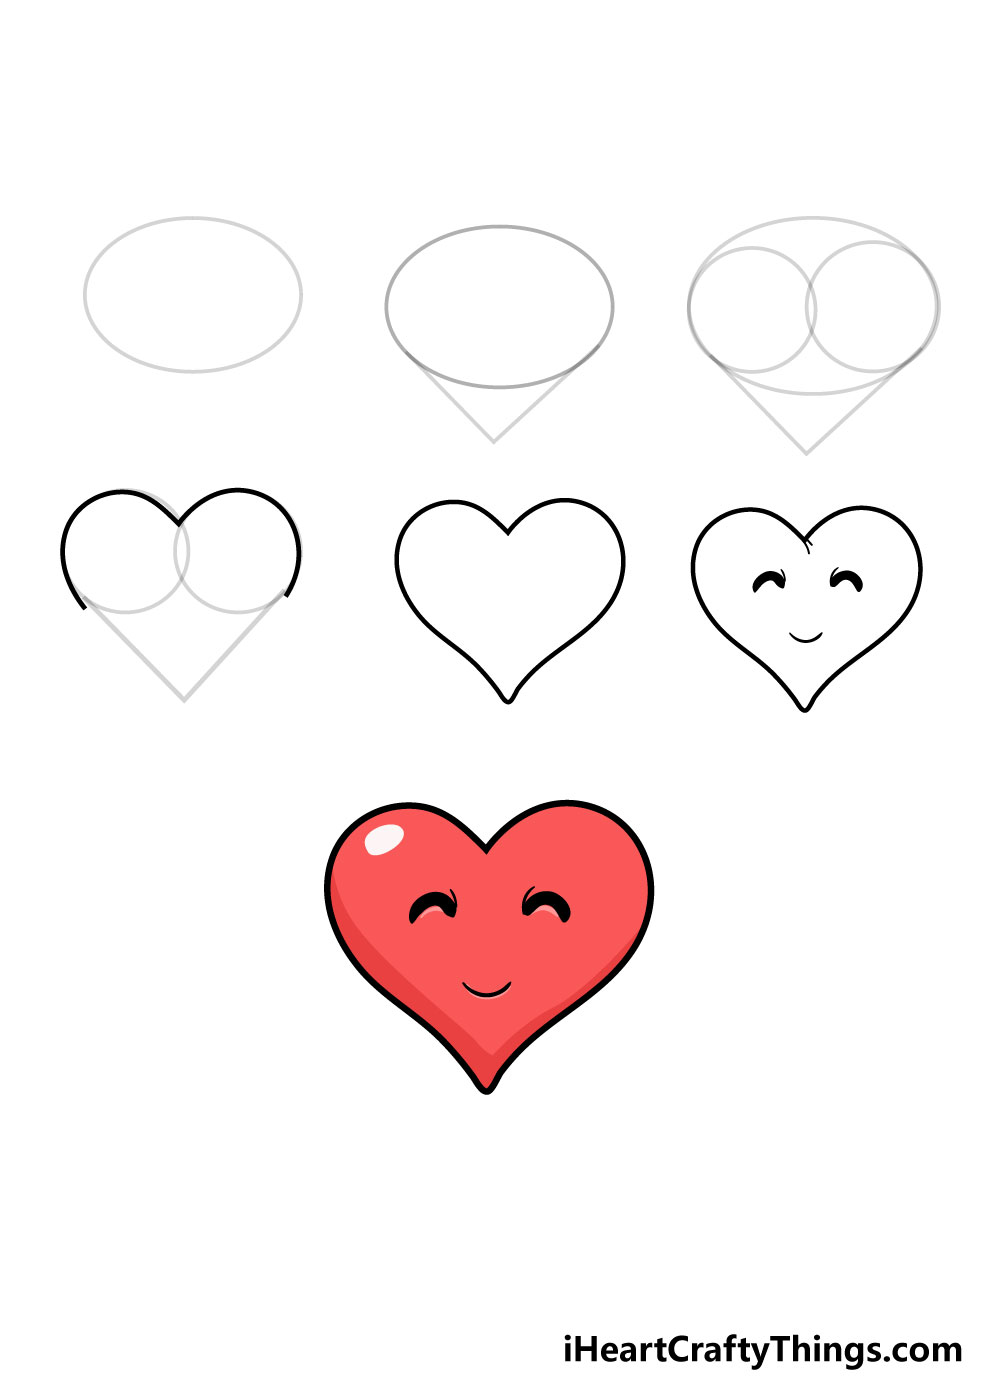
What's in this Blog Post
- How to Draw A Heart – Let's get Started!
- Step 1
- Step 2 – Next, draw in some guiding lines
- Step 3 – Now, draw in some pencil circles
- Step 4 – Next, we will draw in the first proper lines
- Step 5 – Now, you can draw in the final details
- Step 6 – Next, draw in some fun details
- Step 7 – Now finish it off with some color
- Do this to take your heart drawing to the next level
- Your Heart Drawing is Complete
How to Draw A Heart – Let's get Started!
Step 1
For the first step in our guide on how to draw a heart, we will be drawing a shape that will help you structure your heart.
For the next couple of steps, we will be using a light pencil, as these elements won't be in the final drawing. To start with, simply draw in a large oval.
Drawing a perfect oval can be tricky when done freehand, so you may want to use a drawing tool such as a compass for this part.
A compass is a tool that makes drawing circular shapes much easier, and it will be very useful for the next couple of shapes!
Step 2 – Next, draw in some guiding lines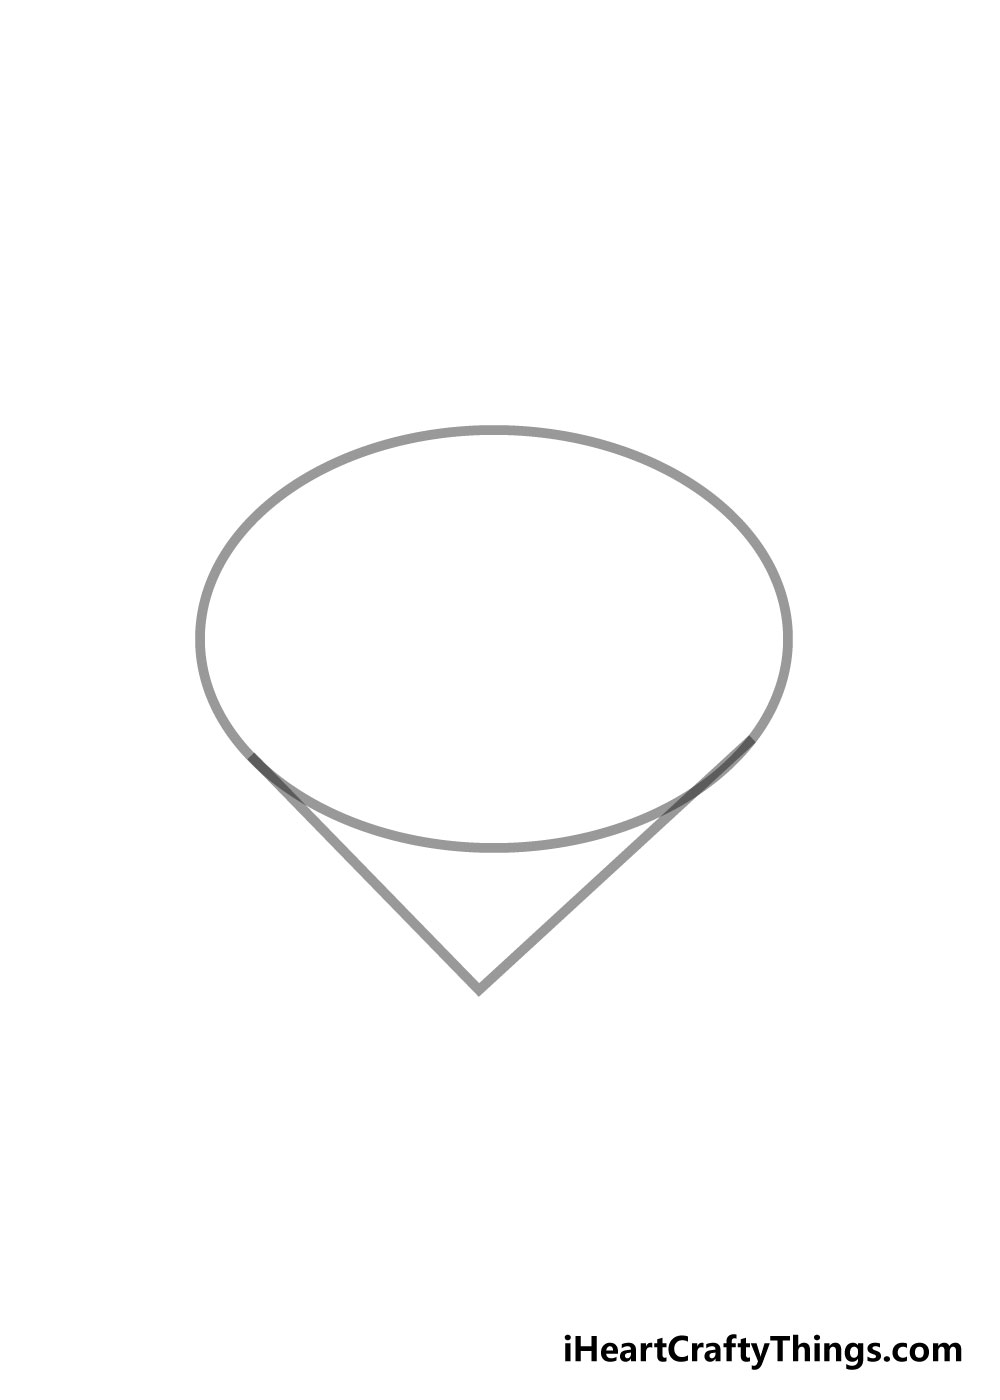
We will again be using a light pencil for step 2 of this guide on how to draw a heart. Using your pencil, you can draw in two lines coming down to meet each other from the sides of your oval.
These will form the tip of your heart drawing when we start to draw in the final lines later. Once you have it looking like the reference image, we're ready to move on!
Step 3 – Now, draw in some pencil circles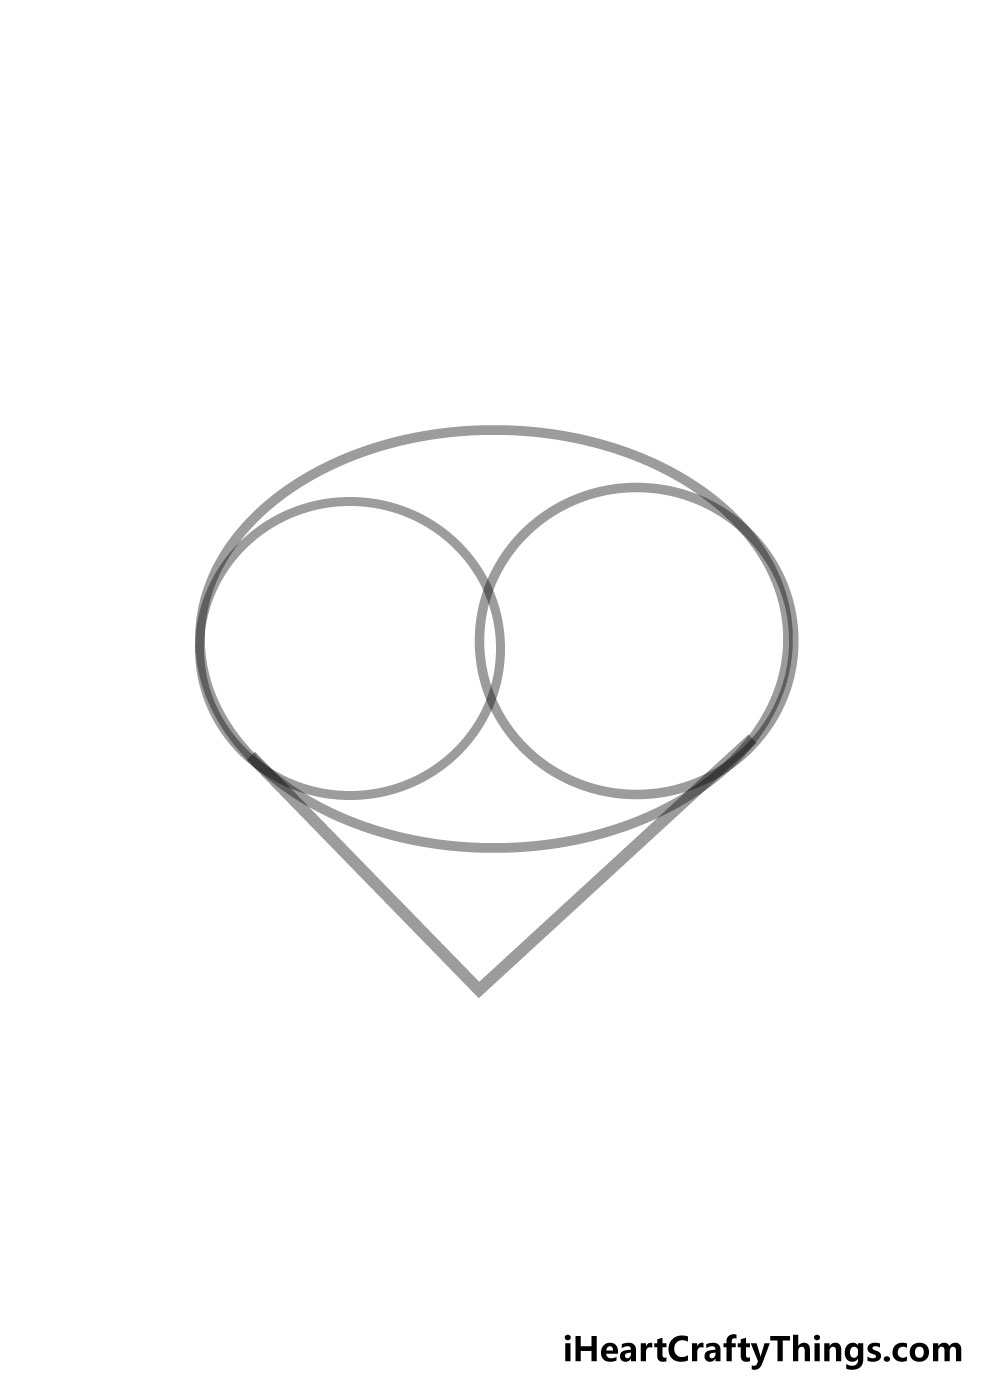
For this step, we only have a few more pencil shapes to draw in. This is another step where a drawing compass would really come in handy!
We will be drawing in two circles whose outer edges will be against the edge of the oval and that will overlap in the middle.
Getting the placement of the circles right can get a bit tricky, so don't worry if it takes you a few tries!
With the circles drawn in, we are ready to start the proper outlines of your heart drawing.
Step 4 – Next, we will draw in the first proper lines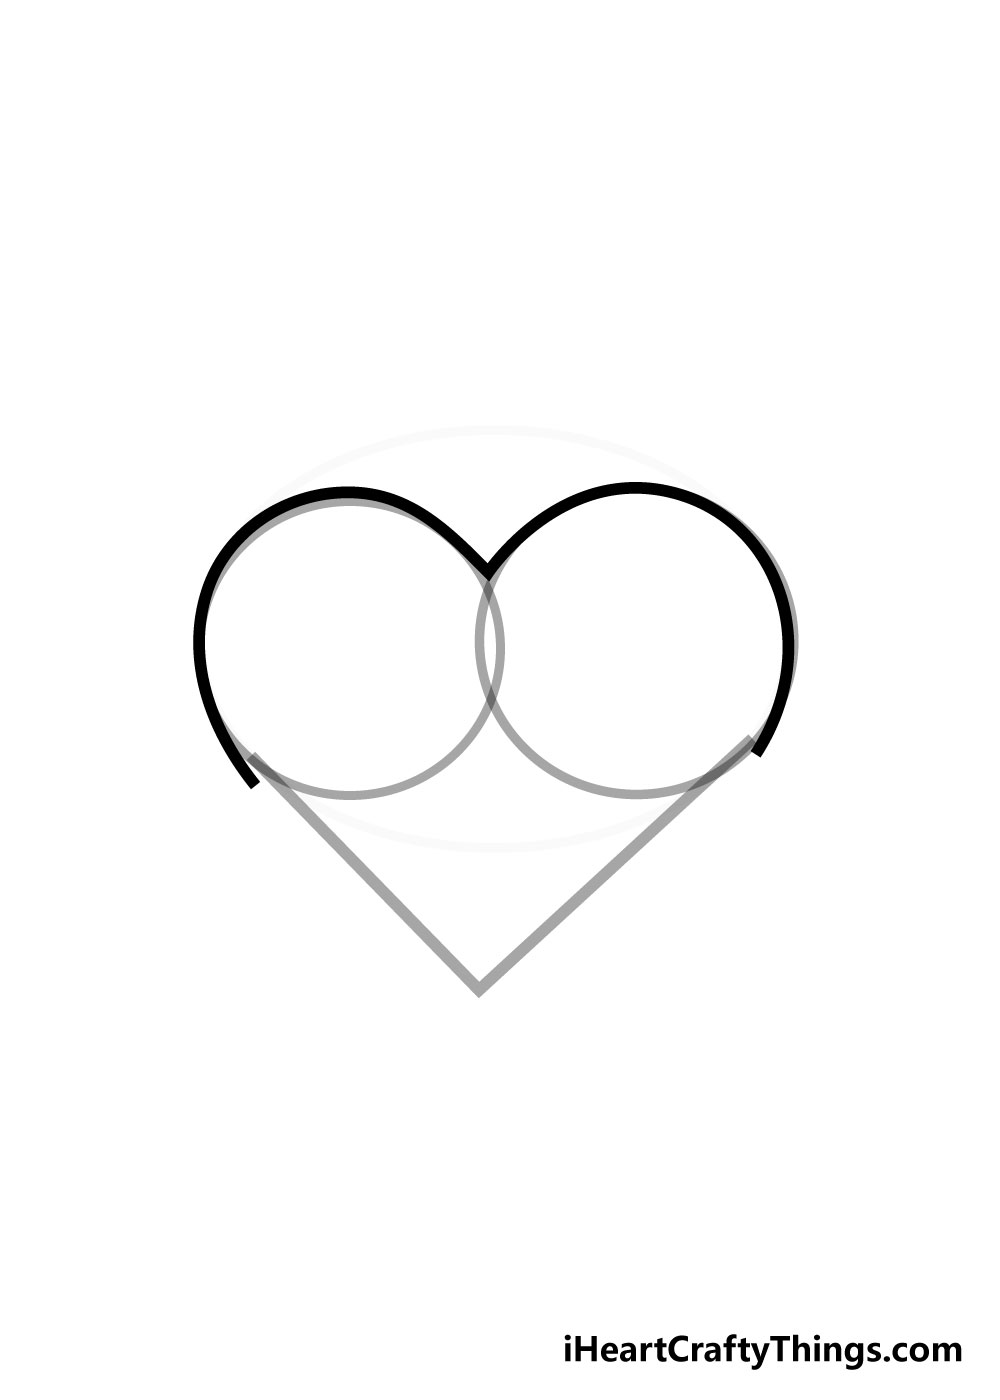
Now you are ready to start drawing in the final outline! Using a pen or a darker pencil, you can draw over the tops of the guiding circles from the previous step.
This will form the top of the heart, and you can use the reference image as a guide to how it should look.
Once you've drawn in those lines, you can start to erase the oval and circles. If you use a pen, be sure to make sure that the pen ink is dry before you start erasing!
Step 5 – Now, you can draw in the final details
You have almost finished your heart drawing now, and in this fifth step of our guide on how to draw a heart we will be drawing in the bottom of the heart.
Following on from the lines you drew over the circles earlier, you can draw in some slightly curved lines that meet at the tip of the two guide lines you drew earlier.
With those details drawn in, your heart outline is all ready to go! The last thing to do before moving on to the next step is to erase the last of your pencil lines.
Step 6 – Next, draw in some fun details
Now your heart outline is complete, and you can have some fun personalizing it a bit!
For our example image, we drew in a happy smiling face onto our heart, so you could replicate that look or you can have fun with your own designs!
You could try out some fun facial expressions, add in some patterns or draw other pictures inside of it. What would you like to draw inside this heart?
Step 7 – Now finish it off with some color
Your heart drawing is already looking great at this point, but there's one more step to help it look even better!
This final step is probably the most fun out of all the steps, as we will be adding in some color to your drawing.
We have shown one way you can color it in with our image, but this is a step where you should really wow us with your creativity!
There is an almost infinite amount of possibilities for how you can color in your drawing, and I think you should use all of your favorite bright colors to fill it in.
You can also have a lot of fun experimenting with different art tools and mediums.
Some examples would be acrylic paints for brighter colors, watercolor paints for softer colors and colored pens and pencils for more detailed coloring.
The sky is the limit, and we can't wait to see how you color in your drawing!
Do this to take your heart drawing to the next level
We're positive you will love these tips we have for making your heart drawing even better!
This drawing of a heart is done in a cartoon style, and you can finish off the character with a few additions.
For example, you could draw some arms and legs onto the heart to make it a more complete character.
These could be drawn in a simple cartoon style, but they will help to make this drawing even better. If you do add some limbs, there are so many fun and creative positions and poses you could draw them in!
Another way that you can add to the character design is by drawing different accessories for it. You could draw a fun hat for the heart to be wearing, or it could be holding a Cupid bow!
These are a few ideas, but it could even be a more involved scene such as the heart painting something onto a canvas. There are so many possibilities, so be sure to try out any imaginative ideas you may have!
Hearts are associated with love and Valentine's Day, so this heart drawing could be used as a card for a loved one.
You could make the heart the front or the center of the card, and then you could add patterns and a message.
It would also be advisable to draw this onto some harder cardboard for this purpose, as it means your gift will last for longer! Do you know someone you could give this card to?
Our last suggestion for this drawing would be to add a background and some interesting colors. The background could be a setting like a funfair or a nice restaurant for a few ideas.
Or, you could make a background by drawing a pattern of hearts behind the main one.
Once you have chosen the background for your heart sketch, you can then play around with all sorts of romantic colors, art mediums and techniques! You could also incorporate some crafts and other fun tools.
Your Heart Drawing is Complete
With the color added in, you have successfully learned how to draw a heart! We really hope that this guide was not only helpful to you but also fun to use!
It may be surprisingly tricky to draw a heart, but if you follow this guide then you'll find that it can be really easy if you know what to do.
Once you've mastered drawing a heart, you can have a lot of fun trying out ways to personalize your drawings even more!
Whether it's with faces, details, a fun background or different color variations and mediums, the only limit is your creativity!
We're sure to see some unique and beautiful heart drawings by the end of this, so this is your chance to really blow us away!
We will be bringing out lots of new step-by-step drawing guides in the future, so be sure to check our site out frequently to never miss out!
Once you've completed your heart drawing and colored it in, we hope that you'll share it to our Facebook and Pinterest pages for us to enjoy.
We really can't wait to see your amazing and creative heart drawings!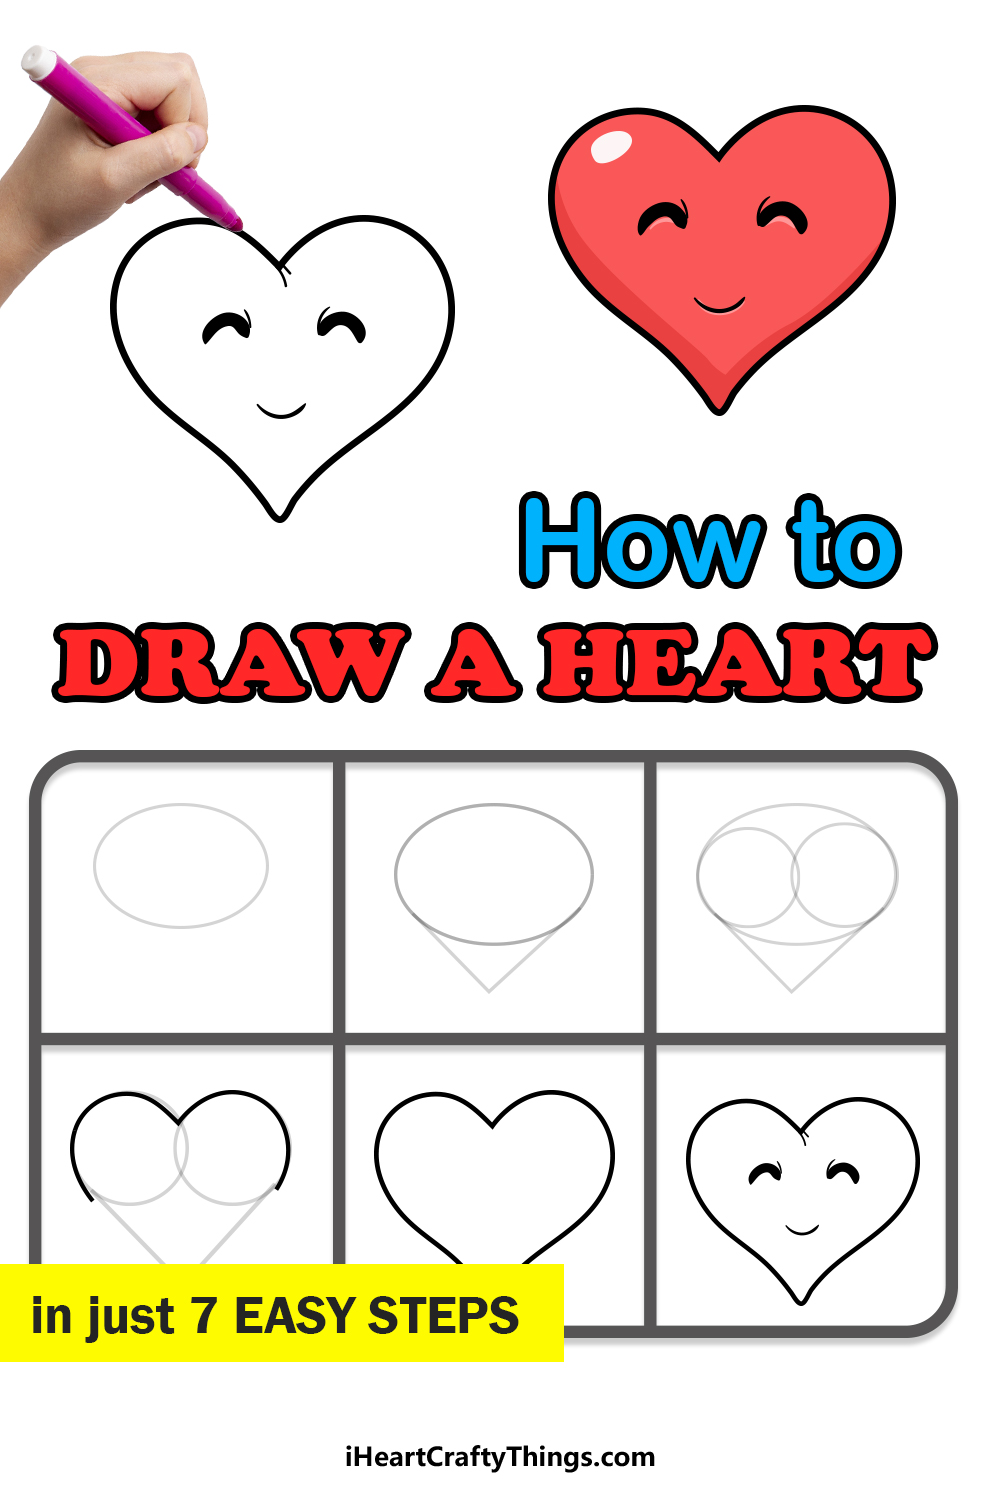
Source: https://iheartcraftythings.com/heart-drawing.html
0 Response to "Easy Pictures to Draw of Hearts"
Post a Comment